You are currently browsing the category archive for the ‘DIY’ category.
I made Easter Eggs last week. Though I had minimal help from the Sprout (or the Goose for that matter), I’m guessing this time next year it will be a whole different ball game.
I saw a picture on Urban Comfort that featured eggs with a twist, so I decided to try and mimic it.
Supplies you’ll need: tissue paper or origami paper, sharp scissors, glue, paintbrush, eggs, egg dyeing kit or food coloring.
Hard boil your eggs. [side note: I have long searched for the best method for hard boiling an egg. After trying several recipes, I’ve decided my favorite is this: put your eggs in the bottom of a saucepan and fill it with water. Bring it to a boil and boil for one minute. Then cover and let sit for 10 minutes. Drain and rinse the eggs under cold water. This has yielded yummy results for me every time.]
I used a mix of brown eggs (because those are the kind I like to eat) and white eggs. It’s certainly up to you, looks wise. Obviously you probably won’t dye the brown eggs, but I like that they have a more natural look.
Follow the directions on your Easter Egg Dyeing Kit from PAAS or whomever, throwing out all of the weird stickers and glitter pens and who knows what else they put in the kit these days. I dyed about half of our white eggs, leaving the other half white. Again, your preference here. You may want to go on the pastel side of the dye (i.e. not leaving the eggs in the dye for very long) so that the paper shows up once you glue it on.
While all of the boiling and dyeing is going on, cut your tissue paper or origami paper into roughly 3″ by 3″ squares. Then try to send yourself back to 6 year old mode and think paper dolls and snowflakes, except this time with flowers. Because my brain apparently couldn’t think back that far and my first couple of flowers looked more like mangled acorns, I used my trusty friend Google to find this basic pattern for a flower. Once you’ve got the folding down, you’re only limited to the extent of your scissors’ dexterity. I tried to mimic the shapes of real flowers in our yard (in a very, very rough sense!).
Once you’ve cut out a bunch of flower shapes of varying sizes, cut yourself a good helping of leaves and stems from the green paper.
Then put some Elmer’s glue into a ramekin, dip a small paintbrush into the glue, and get to work putting glue on the back of your tissue flowers and positioning them onto each egg.
A nice alternative to dyed eggs this year at our casa — particularly if you’re like me and you have a surplus of tissue paper.
If you decide to make a mix-tape of your own for your valentine, your sprout, or yourself, here is cute free downloadable CD case artwork (as well as an alternate playlist).

Also, if you are fruit eaters, here’s another idea (and free downloadable art) from Twig + Thistle on making your produce more romantic:

Two projects tackled this week – both (kind of) food related.
The first: recipe organization.
Everyone has a unique system for organizing recipes. Some are more efficient than others. Mine did not fall into that category.
I love to tear recipes out of magazines (or dog ear recipes, and leave stacks of 3 year old magazines all over our house). I have a cardboard magazine holder stuffed with torn-out magazine recipes, printed out 3 x 5’s from the computer, and hand-written recipes gathered from friends. Every time I need one of the recipes, I dump out the growing pile on the kitchen table and hunt through the stack one-by-one (and invariably the one I’m looking for is always on the bottom of the pile).
I’ve been intending for at least a year to transcribe all of these recipes into my hand-written recipe book. I knew I’d have ALL THIS TIME being at home with the Sprout. Right. That’s reeaallly working out.
So, the rain, cold, and runny-nosed child kept me home long enough this week to be able to trim all the torn recipes, categorize them, and glue them into a spiral notebook. So much less work than transcribing — and now in many cases, I have pictures of the food as well.
I heart organization.
The next project is only obliquely food related… but much more fun. GARDEN PLANNING!
Don’t mock my 96-pack of Crayons. They make me happy.
For anyone who’s contemplating a vegetable or flower garden, I so encourage you to sketch it out to scale before you start planting. I still fight the battle each year of planting way too much in my small space (read: pumpkins) – but it would be so much worse if I didn’t draw it out beforehand.
First, read your seed/flower catalogs. Make a list of what you like. Research to make sure it grows well in your area, and write down the size/watering requirements. Sketch out your garden – how do you want it to look? Do you want space between all your plants, or do you want more of a cottage garden look? Do you enjoy weeding (if you do, will you come move into the house next door)?
Then think through which seasons in which the plants will bloom/ripen, their colors, etc., and get to sketching.
I have this great sketchpad that makes this easy. I’ve seen it at several different shops. You can also buy it from Terrain. If you remotely love flowers or garden-y things, you will love this shop. I also have a birthday coming up. Ahem.
Even though there’s ice on the trees in our yard this morning, the fact that
THIS
is going on outside under the leaves and frozen tundra in our yard makes me immeasurably happy.
Bits of happy for today.
This 10 minute project brightening the kitchen window.
Idea credit: Dottie Angel
While I’m on hearts, here are some other fun ideas.
Free Printable Sentiment Poster
This adorable Heart of Gold print from Banquet.
In non-heart matters, these little girl shoes are so stinking cute.

As is this West Elm pillow.

Cooking with fresh things = eventually, less flab. Also, side bonus: fresh scraps for the compost pile.
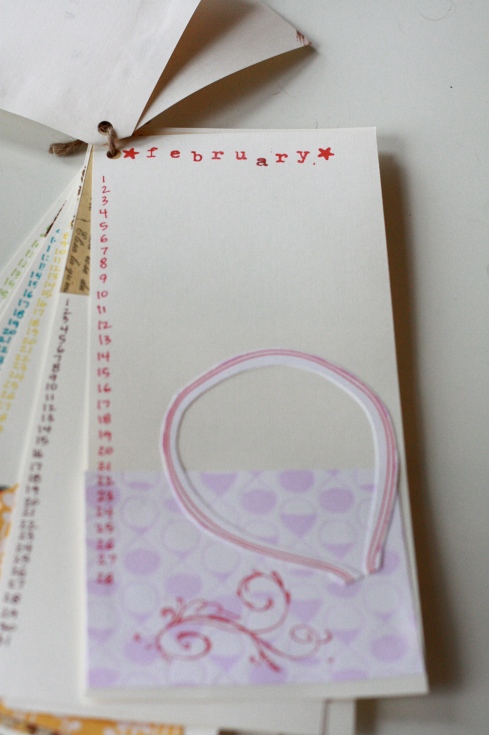
I tackled the second craft of the week with my friend Swan. We’d read about a great journaling idea here for capturing the best parts of each day and decided to replicate it for ourselves.
It is a (cute) way to keep track of the good, small things that happen each day, so that we can look back at the end of a month or year and be able to reflect with genuine thankfulness.
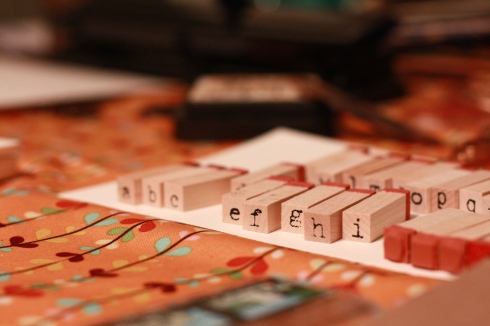
We started with long strips of cardstock, a set of stamps, leftover craft paper, and old letterpress calendars. In case you haven’t noticed, I’m a big proponent of re-purposing old calendars.
We then stamped a sheet for each month, and embellished with scraps.
Next, we numbered each day in the month (pay no attention to the fact that in my calendar, June has 31 days), hole punched them, and tied them together with twine.
Now, each night before I go to sleep, I’ll take a minute to document the best part of my day in this calendar, and at the end of the year I’ll have a whole collection of good, sweet moments for which to be thankful.
My creative juices have been flowing this week. Add in Martin Luther King day and a little extra time, and I have some new craft ideas to share.
This was billed as the EASIEST CRAFT EVER by one of these unnamed neighbors. Not so much.
But because she also does things like THIS
and THIS
I suppose I’ll forgive her.
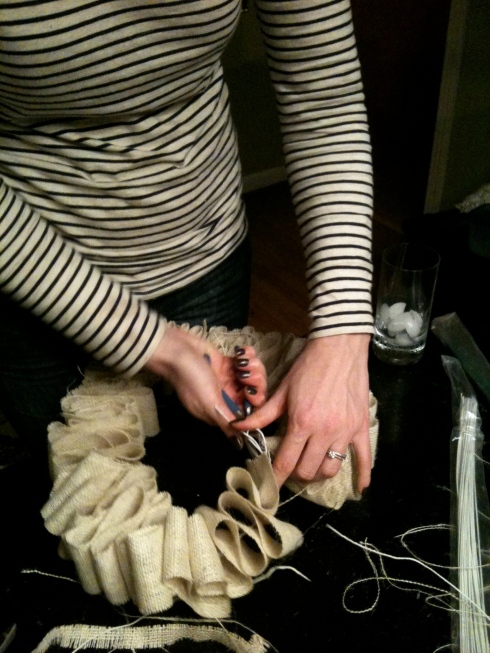
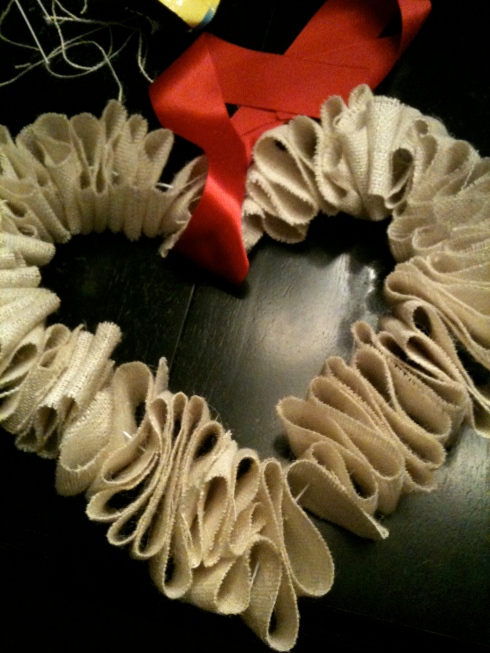
I really did think making a Valentine’s wreath by stringing burlap onto floral wire would be a 30 minute project. 3 hours and severe burlap inhalation trauma later, we finished our three slightly wonky wreaths.
[Excuse the grainy iphone pictures]
You begin by taking two 18 inch pieces of floral wire (we found out — much too late — that a coat hanger works a bit better) and shaping them each into half-heart shapes. Connect the two halves by one end, and leave the other ends loose.
Cut 2.5 inch strips along the long side of a 1 yard piece of burlap. Then take the strips and weave them onto the wire.
Once you’ve woven all of your burlap strips onto your heart, making it very full (otherwise, all the burlap will slide to the bottom of the heart when it’s hanging… trust us), twist the open end of the heart closed with pliers.
Then, hang with a red satin ribbon, and straighten out the burlap so that the strips are all facing sideways on the wreath.
Lest you be concerned, this is the full extent that our house will be decorated for Valentine’s Day, or February in general.
Have I mentioned that I love Christmas?
Not the sappy Christmas music on top 40 radio (or even XM — does anyone else hate the XM Christmas music stations as much as I do? ) or the futility of trying to drive anywhere near a shopping mall on a Saturday, but rather, the cozy way Christmas fills up our house.
The sweet woodsy scent of our tree reaches all the way to our bedroom. We get to eat dinner on Christmas dishes every night. (And by dinner last night, I mean cereal. Sorry, husband. At least it was in a Christmas-y bowl.) I love going through an Advent devotional each day, curled up in bed with FCL. And I love the way decorations soften the walls of our house and make me want to stay under a quilt watching Holiday Inn (or this) and drink hot tea all day long.

I’d like to take a brief moment and apologize to Marisa Martin, Jill McCleskey, Katie Witthauer, Michelle Bloch, Katie Dixon, Claire Hardin, Melissa Galbreith, Susan Russell, Courtney Wright, my husband, and anyone else who has ever lived with me during the month of December, for subjecting you to an inhumane number of viewings of this particular movie.
Now back to business. Here are a few other crafts I’ve been working on:
1. Cedar Wreaths — I didn’t want to pay the money pretty greenery usually costs at the garden shop, but I love the look of wreaths and garland on the outside of a home. We have 6 cedar trees in our front yard, so I mined them for branches. Supplies needed: cedar, fir, or pine branches, wire wreath frame (about $1 at Joanns), floral wire, and pliers.
Wind each cedar branch around the wire frame, securing it in two places – at the base of the stem, and again near the end of the branches, so that it lays more or less flat against the frame.
To secure the branches, cut floral wire into two inch sections.
Once each wreath was full enough with cedar to my liking, I wrapped a strand of Christmas lights around each one and slapped them on the windows! Please forgive the ghetto look of the unlevel mini-blinds seen through the window.
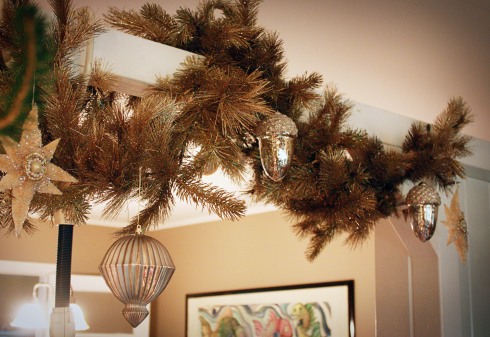
2. Burlap and Sparkle — Next, to pizazz up some brownish-gold garland I usually string around a couple of doorways in our house. I used to hang colored ornaments on it, but trying to stay with neutrals while re-using things I already had, I took some plain glass ornaments from Target and stuffed scrolls of cut burlap down into them. This, mixed in with gold and silver balls, lent just the right natural quality to give it some interest.
Clear balls with burlap would be really cute hung from branches collected from your yard and suspended on a wall — or intermixed with branches or clear vases of dried leaves or white fall flowering plants as a table centerpiece.
3. Pine Cone Chair Sash- The last project I tackled was probably the easiest. Supplies: burlap, jute twine, pine cones.
To change up the look of the dining room chairs (which I also use as sewing machine chairs, i.e. this shot) for the holiday, I cut strips of burlap leftover from Sprout’s nursery into long pieces (maybe 1′ x 4′- I didn’t measure at the time).
I then simply looped them around the chair like I was going to tie a knot, but didn’t. Instead, I ran some jute twine under the top row of tines on a pine cone and tied it around the sash created by the burlap. I saw this done somewhere recently with a large jingle bell instead of a pine cone. Cute.
I decided I wanted to put a homemade (and cheap) spin on our Christmas decorations this year. In that vein, here are a couple of holiday-themed projects I’ve tackled in the last couple of weeks. Disclaimer: I picked up most of these ideas from folks much more creative than I.
All of these were easy to accomplish in small snippets of time — it was so rewarding to 1. up-cycle things I already had, 2. bring the outside in, 3. DIY it!
GARLAND-PALOOZA
1. Paper Circle Garland – all you need for this craft is an assortment of interesting, thick paper, a circle cutter, and some thread (I used a sewing machine, but you could hand-stitch it without too much trouble).
If you’re like me, you hate to throw away Christmas cards once the season is over. So, I took my stack of 2009 Christmas cards (sitting in the closet exactly where I put them last January), added a stack of leftover craft paper from my sweet friend Swan’s wedding and an old 2009 letterpress calendar, and started cutting circles. My circle cutter makes 3 inch circles, but I think it would be even cuter if the circles were a bit smaller, say 1.5-2 inches apiece. I cut out the pretty parts and faces from all of the cards, and then one by one ran them through the sewing machine back to back, creating one long garland. Obviously, you could customize this to whatever length you’d prefer.
The sewing part took all of about 10 minutes, and now I’ve preserved all of the sweet faces of our friends and family and added some festive flair to string over the blinds in our den- this season, or year round.
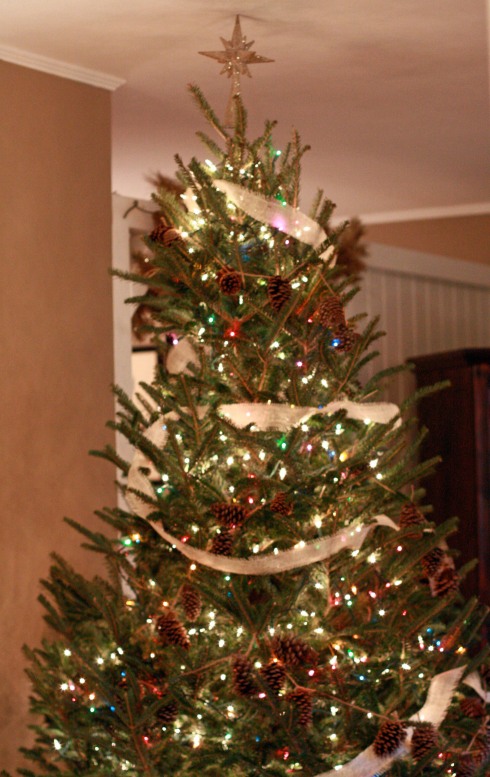
2. Pine Cone Garland – One of the things I miss about my parents’ house (that I NEVER thought I’d miss, growing up in Central Mississippi) is the pine trees. On a recent trip home, Dad and I filled up a huge sack with pine cones to bring home to Birmingham. One way I’ve used them is as garland on our tree!
Supplies needed: pine cones and twine. I simply took a long strand of thick jute twine and cut it into about 40 six-inch pieces. I then unwound an approximately 8 foot long piece of jute. Running the six-inch jute twine under the uppermost row of pine cone tines on each cone, I’d then secure it in a simple loop around the long garland strand, which allowed me to secure each individual pine cone to the garland. The jute has enough texture that a knot isn’t even needed. I affixed roughly 40 pine cones, spacing them in groups of two’s and three’s. This made a garland more or less long enough to cover our 8 foot tree.
One other addition that I was excited to run up on is a strand of 2 inch burlap ribbon. It is a nice natural complement to the pine cones and jute.
3. Felt Garland – This idea was blatantly stolen from the pages of The Land of Nod. Supplies needed: felt, sharp sewing scissors, sewing machine (optional), hot glue gun (optional).
I made this project with neighbor Katie and some other crafty girls one recent afternoon. We decided to make felt Christmas trees for our garland, but you could do mittens, stars, and so on. We began cutting several different shapes of trees about 7-8 inches in length out of several different colors of felt. I doubled the thickness of felt for each of my trees to give them more heft.
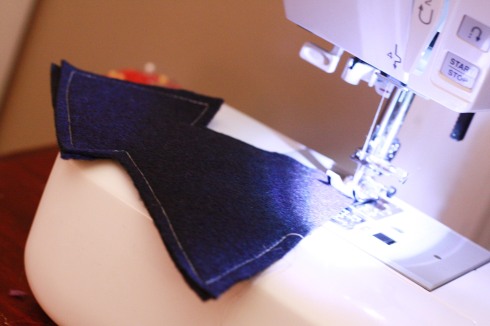
Once I’d cut two pieces of felt for about 20 trees and 20 brown two-inch stems, I sewed the two sides of each tree together and onto the stem with about a 1/2 inch seam allowance. You could also hot glue the tree sides together just as easily.
When I finished sewing the trees together, I decorated each one a little differently. On some I hot glued circles and hearts, and on some I sewed strands of contrasting thread. The sky is the limit, here. Finally, I sewed each tree onto a strip of bias tape (essentially, ribbon), leaving a few inches between each tree. They now happily adorn the space above my kitchen sink. If you’re doing this garland for your Christmas tree, I’d make each shape a bit smaller — more like 5-6 inches in height.
4. Doily Garland – This was a super easy project to tackle. Supplies: fabric doilies (99 c at Joann’s), jute twine, fabric stiffener.
I dipped the doilies into a bowl of fabric stiffener slightly diluted with water, wrung (wrang? what even is the past tense, here??) them out, and laid them on wax paper for several hours to dry. Once stiffened, I strung them onto a jute garland and secured each doily in place by knotting on each side of its place on the jute. I then displayed it across the mantel. Wa-la!
Bonus: I can use this throughout the winter, or pull it out again come Valentine’s Day.
Unrelated aside: I saw an amazing display of white and neutral Christmas decorations at a booth at Mistletoe Marketplace last month, and decided to try my hand on the mantel this year. All that to say, think of all the things we already own that could work in our favor when doing white/neutral. A stack of cream colored dinner plates, bland candles, interestingly shaped branches from the yard — there are so many ways this could go, using things around the house and yard.
There are a few other small projects that I’ll detail in the next post. Have a happy day!


